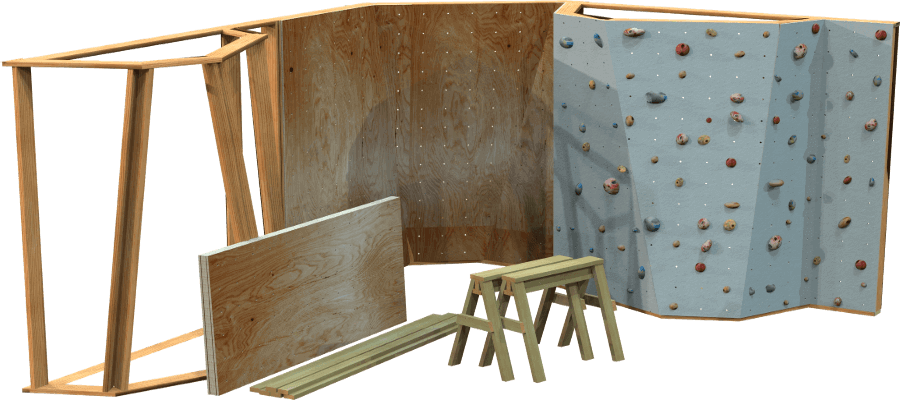
Planning to Build a Climbing Wall
"If you fail to plan, you plan to fail" -- Ben Franklin.
Planning comes down to this, what is the reason you want to build a home climbing wall? Answer this question before you begin planning. The key is, build a climbing wall with the features that compliment your reason for building a climbing wall.
Vertical walls will help you improve endurance, balance, lock-offs, cross-throughs, gastons, sidepulls, flagging, matching hands or matching feet, high steps, backsteps, and toe pulls. You can easily add volumes and interesting features later if you want.
Moderately Overhanging Walls will help you with dynamic movement, like dynos and lunges. You will develop upper body strength and technique like the kneedrop and heel hook with a moderately overhanging wall.
Steep Overhanging Walls will develop your upper body strength, torso, back, leg and basic body tension strength. Steep overhanging climbing walls will help you with short burst, maximum exertion in sets. You won't need a lot of height or length for this type of climbing wall.
Maybe you don't even have a training goal, you just want to build a climbing wall for fun, recreational bouldering in a little spare time. For a climbing wall like this you can plan some vertical sections then transition to a moderate overhang then to steeply overhanging ledge. Be creative. Caves, stalactites, columns, volumes will make it both fun to build and fun to climb on.
Make a sketch
 Climbing Wall Planning and Concept Sketch
Sketch your concept on paper and put dimensions on as many edges as you can. Revise and re-draw until you think you have it, then get some opinions/ ideas from other climbers. Fresh eyes give you ideas you may not have considered, including safety, anchoring, fallzone, and other considerations that you may miss due to the "forrest for the trees" factor. Get opinions and suggestions early on in the planning process so you don't have to make big changes later.
Work Space. Make sure you have enough area to assemble the pieces separately, fasten them together, then stand them up. As a planning factor for work area, allow about twice as much area than the wall will require when built. This of course will vary based on the degree of overhang and height. Make sure you have enough clearance to stand the wall up with out getting it wedged against the ceiling before it is in place. Use your model to think through the assembly step. If necessary modify the concept model slightly to fit the reality of your physical constraints.
Locate the electrical lines and any other cables or objects in the wall or ceiling before attaching anchors for the climbing wall. Get up in the attic and check above the ceiling to locate and verify electrical lines or other utility lines. Utility lines in the attic are often close to the beams and joists. Make sure you climb up and visually check for clearance before cutting or drilling. Modern stud finders can also tell you when there is an electric line behind the wall. See Stud Finders on Amazon.
Building Permits. A personal climbing wall in your home, garage or basement, which does not alter the structure of the existing facility, most likely will not require a building permit. You will need a building permit if the work you are planning requires renovating, remodeling, changing bearing walls, or new building at your home. Check the specific requirements for your location with your city.
Common Tools. Note: these lists should be used to jog your memory, not as a definitive list.
 Commonly used tools for building a climbing wall
- jig saw
- Circular saw
- Chop saw or miter saw
- drill
- drill bit attachments, Phillips and Standard
- 4-foot level
- tape measure
- framer’s pencils
- gloves
- safety goggles
- earplugs
- framing square
- tool belt
- string
- laser level
- stud finder
- T-bevel
- drill with screw driver attachment
- level
- chalk line
- tape measure, marking pencils
- extension cords
- crow bar or pry bar,
- ratchet and sockets
- gloves, safety glasses
- combination or framing square
- step ladder and / or extension ladder
- 2 saw horses
- "C" clamps and wood clamps
- 1/2", 5/8", 5/16" drill bits
- hammer
- step ladder and / or extension ladder
- chisel
- nail apron or tool belt
Common Materials for Homemade Climbing Wall Designs.
- 3/4" plywood
- 2x4, 2x6, 2x8
- 3" and 4" self tapping screws
- lag bolts, washers, nuts
- 1/2"x6" and 1/2'x7" carriage bolts
- joist hangers
- t-nuts
- work table and/or 2 saw horses
- paint, sand, drop cloth, roller, roller frame, 5 gal bucket / roller screen, brushes, sand for texture
- straps with a cinching device
- L-Straps
- I-Straps
Also see:
Home Climbing Wall Design
Constructing a Climbing Wall Framework
Plywood vs OSB for Climbing Walls
Cutting Irregular Shapes
Structural Connectors for Climbing Walls
Rise-Run Online Calculator
How to Make Climbing Holds
How to Install T-Nuts
